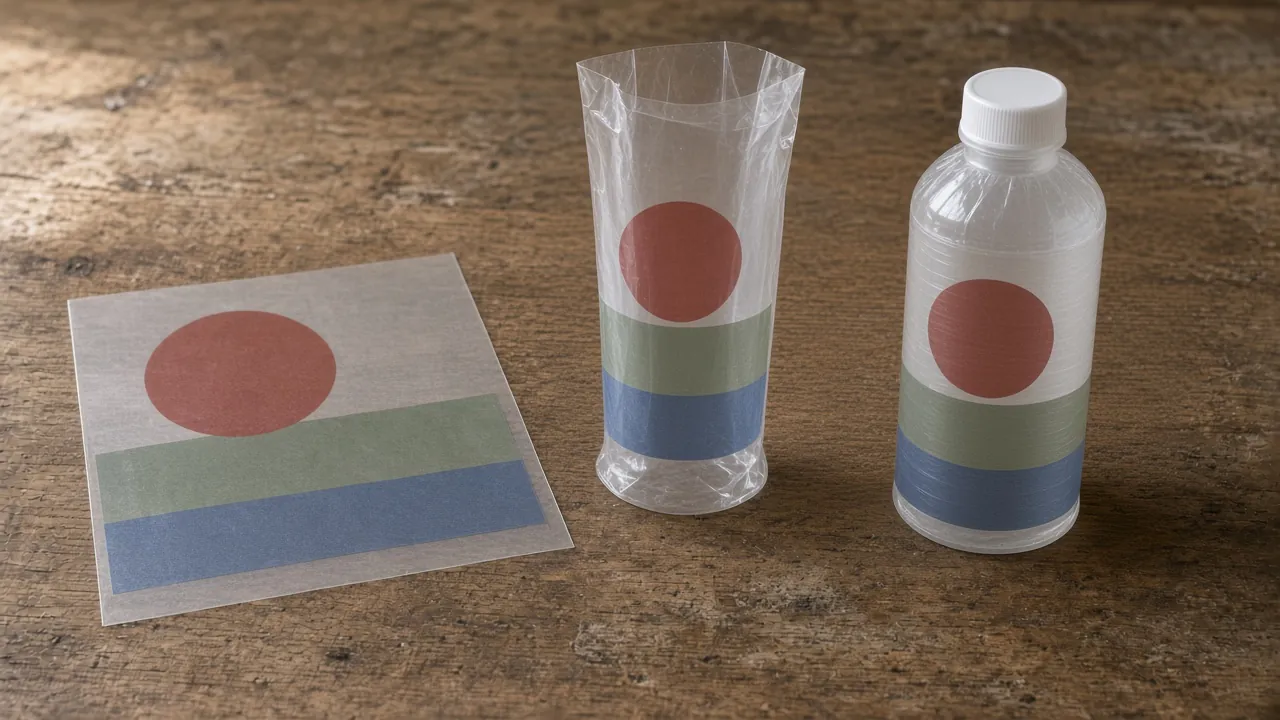
A shrink sleeve proof can be approved while it is still flat, yet the reader sees it only after the film has become a tube and shrunk onto a curved bottle. Keep one record that follows the same logo, key copy and seam from the flat proof to the unshrunk sleeve and the shrunk bottle, tied to the exact bottle, film and artwork revisions.
Resource Label Group (RLG) describes a shrink sleeve as film seamed into a tube, applied over part or all of a product and heated until it conforms to the container. Its guide also points out that the artwork proof is flat and unseamed while the sleeve arrives as a tube. This page turns that gap into an editorial recording method compiled from public supplier guidance. It is not our own testing, a shrink prediction or an approved package.
| What to have in hand | Where it comes from | Why it belongs in the record |
|---|---|---|
| Bottle and closure | Drawing or sample with a revision | The sleeve is shaped by the actual container and its parts |
| Film identity | Converter or film supplier designation | Each film type has its own shrink properties |
| Designer artwork and converter artwork | Two separately versioned files | The converter may pre-distort the art before the proof |
| Converter template and proof | Template and proof revision | Shows where the seam and fold lines will be |
| Physical samples | Unshrunk sleeve and shrunk bottle with IDs | The observed position is the evidence, not the flat file |
Images on this page are generated editorial images or schematics for illustration, not actual packages, test records or performance evidence.
Pair the bottle, film and artwork revisions first
A comparison only means something when every state belongs to the same set of versions. RLG explains that its process starts from a 3D scan of the intended container, including lids or spray triggers, and that it then distorts the received art so that it looks natural once wrapped around the container. That puts at least two artwork files in play: the designer’s art and the converter’s distorted version used for the proof. Record both, with the template revision they were built on.
RLG also notes that the applicator can influence sleeve specifications “down to the size and material selection”, and that each film type exhibits its own shrink properties. Neither statement tells you which film or setting suits a given bottle. They tell you which identities to write down before an observation is trusted.
| Item | Revision or ID to record | Notes |
|---|---|---|
| Bottle drawing or sample | ___ | Same container family and revision as the line bottle? |
| Closure, trigger or other parts covered or touched | ___ | Include them if the sleeve reaches the neck or shoulder |
| Sleeve format and covered region | ___ | Full-body, partial-body or neck band, and where it starts and ends |
| Film designation from the converter | ___ | Supplier name and grade as stated; lot if known |
| Designer artwork file | ___ | The version the brand team approved |
| Converter template and distorted artwork | ___ | The files the proof was made from |
| Proof revision | ___ | Date and who issued it |
| Sample IDs and how they were applied | ___ | Hand-applied prototype or applicator line; who applied them |
Underscores are blank project entries, not measured values. Wildpack Beverage’s distinction between full-body, partial-body and neck-band sleeves is useful here only to fix which part of the bottle the proof covers. If the upstream bottle condition is part of the question, attach the label-ready bottle handoff record. A PET pressure-sensitive face material in the BOPP, PET and PE construction comparison is a different construction from a shrink film, so do not carry a material conclusion across from it; the materials section keeps those construction decisions separate.
Takeaway: Identify the bottle, film, both artwork files, template and sample before comparing any positions.
Mark the artwork features you will track
Pick a small number of features that are easy to find in every state: the main logo, the key copy block, the barcode area if there is one, and any graphic that must line up across an edge. Give each one an ID on the flat proof. Pack Leader USA advises keeping key information such as logos and text out of areas prone to high shrinkage and thinking about how the container’s shape affects what stays visible. This record does not predict where those areas are on your bottle; it notes where each feature was meant to be and where it was actually seen.
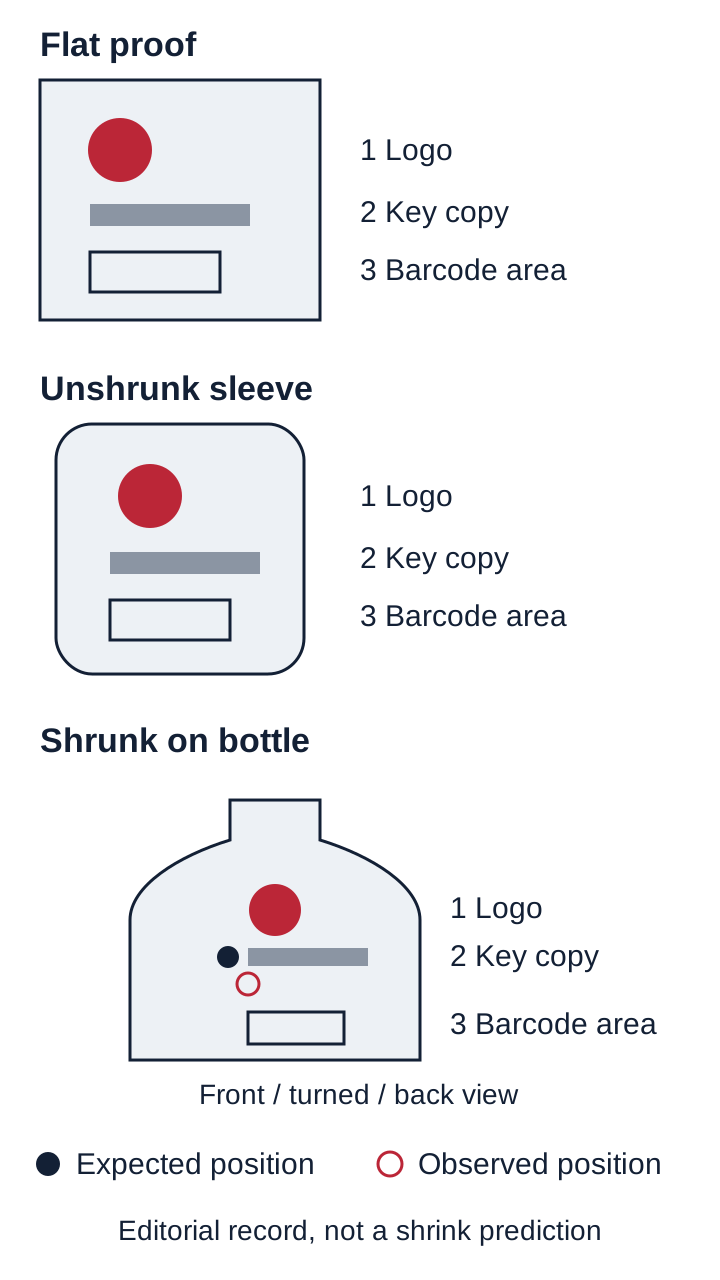
Editorial record layout, not a shrink prediction or test result.
| Feature ID | Intended position (front / turned / back view) | Flat proof location | Unshrunk sleeve location | Shrunk bottle observation | Unresolved change |
|---|---|---|---|---|---|
| 1 Logo | ___ | ___ | ___ | ___ | ___ |
| 2 Key copy | ___ | ___ | ___ | ___ | ___ |
| 3 Barcode area | ___ | ___ | ___ | ___ | ___ |
| 4 Edge-matched graphic | ___ | ___ | ___ | ___ | ___ |
Describe a change in words and photographs rather than inventing a percentage: “the copy block sits on the shoulder curve in the front view” is a usable observation. Where the label area is limited by a shoulder or a short straight wall, establish the usable zone first with the small bottle and jar label-zone record. The same approval habit appears in the clear vs. white artwork proof record: compare on the real package, with the revision written beside the observation.
Common mistake: Approving the converter’s pre-distorted proof by comparing it with the designer’s original file, then reading every visible difference as a printing fault.
Takeaway: Track the same few features by ID through every state, and write down what was observed.
Keep the seam separate from the fold lines
RLG’s guide explains that the left and right edges of the flat proof are joined together to make the seam. Its glossary keeps three terms apart: the seam is the point where the ends of the sleeve overlap; the fold lines are the two folds of a flat finished, seamed sleeve; and the layflat is the width from one fold line to the other. A fold on the flat sleeve as delivered is therefore not the seam, even though both appear as lines near an edge.
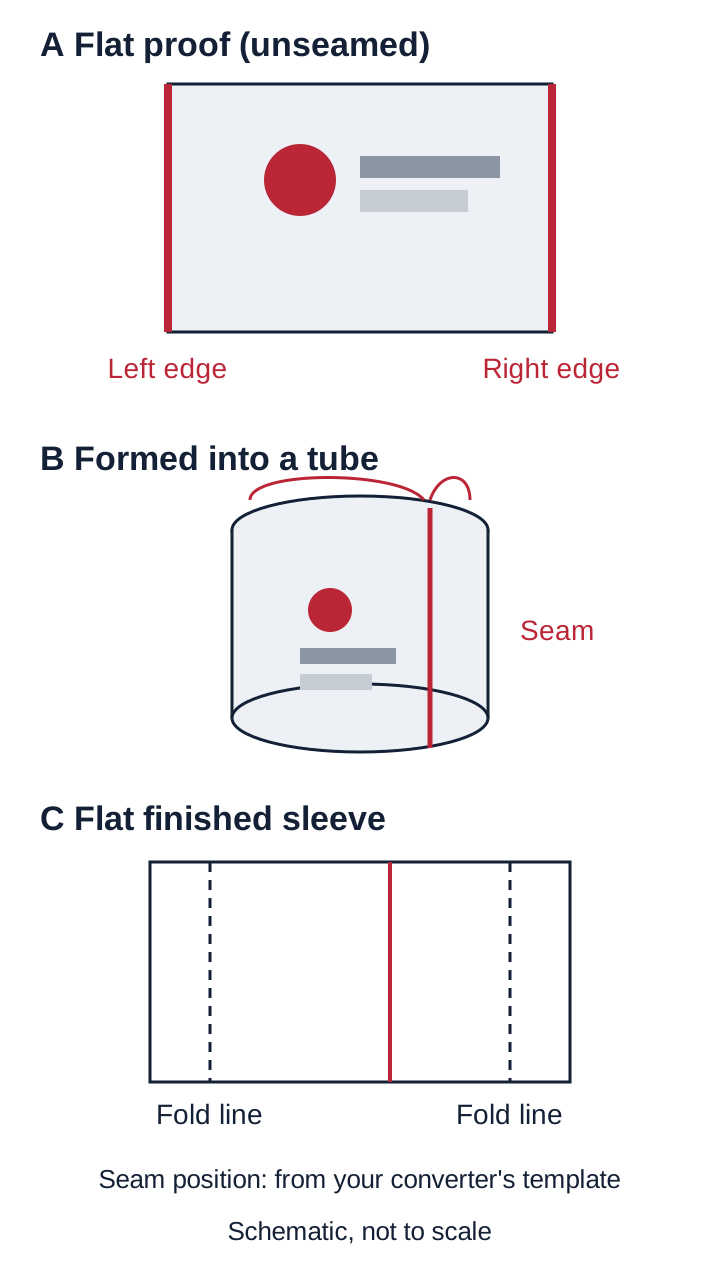
Schematic, not to scale. Seam and fold positions on a real job come from the converter’s template.
RLG describes providing a blank template that shows where the seam and fold lines will be placed. Ask your converter for theirs and mark the seam on your flat proof from that template, not from a generic dieline. Margins, clear areas and seam widths in a supplier’s example drawing belong to that supplier’s process, so they are not copied here. RLG presents its glossary as a way to check the proof before signing off, which is how it is used below.
| Seam and important-copy check | Entry |
|---|---|
| Seam position source | Converter template revision ___ |
| Seam position on the bottle (front / turned / back) | ___ |
| Features near either joined edge | Feature IDs ___ |
| Graphics that must meet across the seam | ___ and what was observed |
| Fold lines on the flat sleeve | Marked as folds, not seam: yes / no |
| Important copy near the seam or a curve | Feature IDs and observation ___ |
| Open question for the converter | ___ |
Readability here is an observation, not a compliance or barcode-grade result; those need their own evidence. If you are comparing a sleeve with a conventional label, the pressure-sensitive construction checklist explains a different layered construction without a seam.
Takeaway: Locate the seam from the converter’s template and record what happens to the artwork beside it.
Compare the three proof states under matched views
Each state answers a different question. The flat proof shows layout and instructions; RLG states that it provides PDF proofs for approval. The unshrunk sleeve shows the seamed tube and the artwork as printed. The shrunk bottle shows where the features finally sit. RLG notes that hand-applied prototypes use individually cut sleeves, while line application uses roll form, so record how each sample was applied before comparing it with the line.
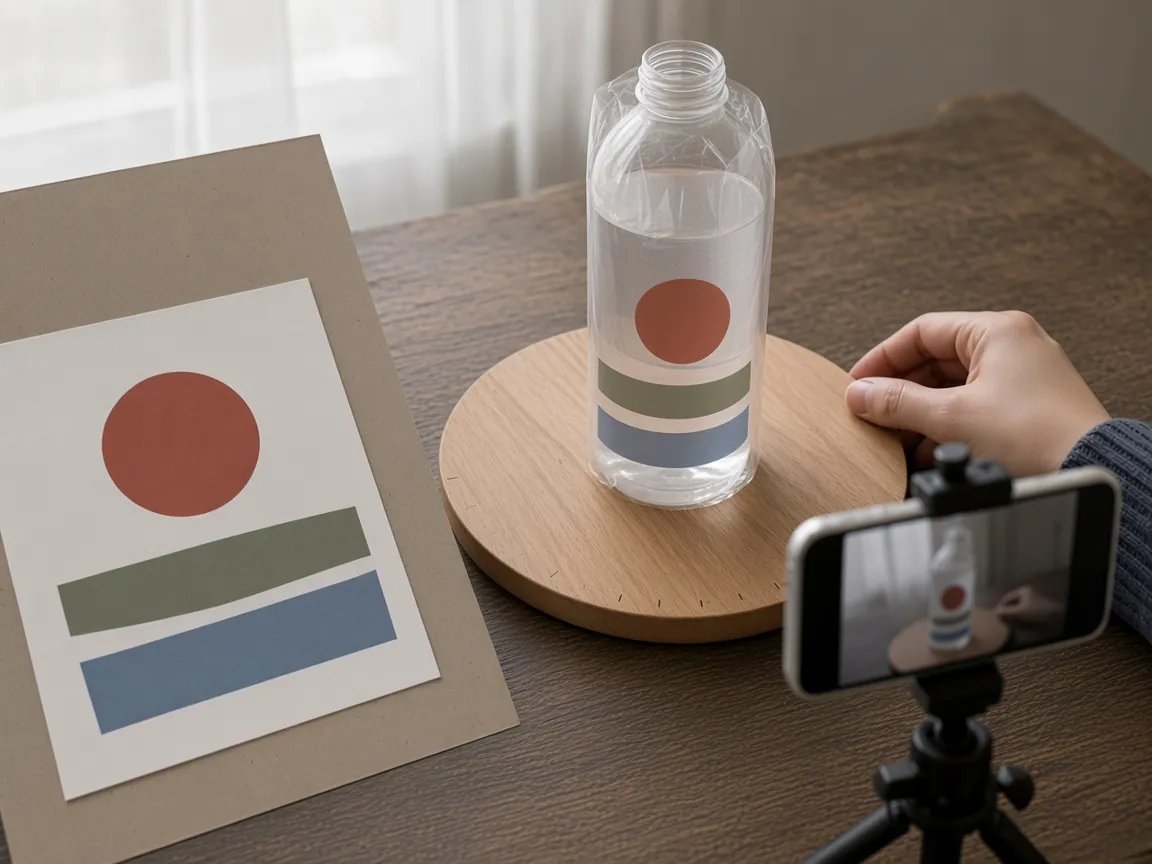
Illustrative photo. Generated editorial image of a matched viewing setup, not a standard test or a real project.
Our editorial suggestion is to keep the comparison simple and repeatable: the same bottle sample, the same named views, the same light and background, and a photograph ID for each view. This is a way to make your own observations comparable, not a standard test protocol.
| State | Sample ID | Views recorded | Light and background | Photo IDs | Observation |
|---|---|---|---|---|---|
| Flat proof | ___ | Whole proof, seam edges | ___ | ___ | ___ |
| Unshrunk sleeve | ___ | Seam, front, back | ___ | ___ | ___ |
| Shrunk bottle | ___ | Front, turned, back, shoulder | ___ | ___ | ___ |
Pack Leader also notes that shrinking can alter colours and recommends testing and adjusting colours with the printing team; note colour differences you see as observations against the named sample. When the sleeve shows wrinkles or other surface changes, separate the symptom from its cause first, as in the bubbles, wrinkles and lifting record. If the front view depends on how the bottle is presented on the line, the inline vs. rotary container requirements help turn orientation into a written requirement.
Takeaway: Compare the states with the same sample, views and light so a difference points to the sleeve, not the setup.
Send unresolved observations back to the converter
Turn each unresolved observation into a row the converter can act on. Approval criteria belong to the project team; the record simply makes the open items specific.
| Feature ID | State where seen | What was observed | Photo or file | Question | Owner | Next proof revision |
|---|---|---|---|---|---|---|
| ___ | ___ | ___ | ___ | ___ | ___ | ___ |
| ___ | ___ | ___ | ___ | ___ | ___ | ___ |
Questions worth asking before the next proof (editorial checklist prompts, not attributed search questions):
- Which template and distorted artwork revision will the next proof use?
- Where will the seam sit in the front, turned and back views of this bottle?
- Which features near the seam or a curve are expected to move, and has the art been compensated for them?
- Will the next physical sample be hand-applied or made on the intended application route?
- Which film designation will the next sample use, and is it the same as the last one?
- Who will confirm the observation on the next sample, and against which recorded views?
For related application and equipment reading, the printing and application section and the labeling equipment section group these decisions with their neighbouring records.
Takeaway: Send back one specific row per open feature, with the sample, photo and next revision named.
When this record does not apply
This record does not establish film suitability, a shrink percentage, a heat or tunnel setting, seam width, safe-zone dimensions, barcode scan grade, regulatory compliance or recyclability. The supplier statements used here describe processes and design advice; they do not cover your bottle. Wildpack’s broader performance and tamper-related statements, and any supplier’s capabilities, are not adopted as claims about your project.
Takeaway: Use the record to make proof observations comparable; use separate evidence for material, process and compliance questions.
Method and sources
Compiled from Resource Label Group’s guide “Shrink Sleeves Demystified” (PDF; process description, proof explanation and glossary, pages 2, 8–11 and 15), Pack Leader USA’s shrink sleeve design article and Wildpack Beverage’s overview of sleeve types, all read October 11, 2026. All three are supplier-authored guidance and are attributed as such. Numeric examples in RLG’s proof drawing, environmental and tamper statements, and promotional claims were excluded. The pairing, mapping, seam and issue records are editorial suggestions with no original measured results. Our editorial policy explains how sources and schematics are handled.
Version record: October 11, 2026 — new shrink sleeve proof-to-bottle mapping record.
Takeaway: A supplier explanation helps plan the record; the identified samples on the actual bottle support the decision.